
If your water filter is leaking, use the appropriate tools to inspect and tighten the various elements of your filter system, clean or replace what’s needed, put it back together, and test for continued leaks.
Not only can a leaking water filtration system damage your home, it can also affect the quality of your drinking water. I’ve seen too many homeowners frustrated by a whole-house water filter leaking and disrupting their lives.
You deserve the peace of mind that comes with a well-functioning filtration system, so I’ve put together this step-by-step tutorial to empower you to tackle and resolve these challenges head-on.
Quick Summary
In this troubleshooting guide, you’ll learn how to address and prevent leaking whole-house water filters with ease. Here are some key points I’ll cover:
- To repair your leaking water filter, assemble the necessary tools and inspect each element of your water filter in turn.
- You may need to disassemble parts of the system or surrounding pipes, checking each component for corrosion, clogs, and other damage.
- Repair or replace what’s needed, put your system back together, and test it, also making sure that other elements of your plumbing system are functioning properly.
Tools
Here’s a list of common tools you may need for this task. You probably already have most of these in your collection:
- Adjustable wrench: An adjustable wrench is essential for tightening or loosening plumbing connections, such as pipe fittings, nuts, and bolts.
- Pipe wrench: If your filter system uses larger pipes or fittings, a pipe wrench may be necessary for gripping and turning these components.
- Pliers: Pliers can be handy for securing hose clamps and tightening smaller connections.
- Screwdrivers: Both flathead and Phillips screwdrivers may be needed for removing and reattaching screws on filter housings, pressure relief valves, or other components.
- Pressure gauge: A water pressure gauge helps you measure the water pressure in your plumbing system, which can be crucial for diagnosing high-pressure issues that can lead to leaks. If your filter system has a pressure relief valve, you’ll also need to check its functionality and ensure it’s releasing excess pressure correctly.
- Teflon tape: Teflon tape, also known as plumber’s tape, is used to seal threads on pipe fittings, preventing leaks.
- Replacement seals and gaskets: Have a supply of replacement seals and gaskets on hand. If you find damaged or worn seals during your inspection, you can replace them to ensure a proper seal.
- Flashlight: A flashlight or headlamp can help you inspect the filter system’s components and connections, especially in dark or hard-to-reach areas.
- Pipe cutter or tubing cutter: If your system includes plastic or copper tubing, a pipe cutter can be useful for trimming and making clean cuts when replacing sections of tubing.
- Safety gear: Depending on the nature of the troubleshooting, it’s a good idea to have safety gear, such as safety glasses and gloves, to protect yourself from potential hazards like water or sharp edges.
- Plumber’s putty or pipe-joint compound: These sealing compounds can help create watertight seals on specific connections or threaded fittings.
- Pressure regulator (if needed): If high water pressure is contributing to the problem, you may need to install a pressure regulator. Make sure you have this on hand if it’s necessary.
- Owner’s manual: The owner’s manual for your specific whole-house water filter can provide valuable guidance on troubleshooting and maintenance, so keep it handy for reference.
Always prioritize safety when working on plumbing systems. If you’re not confident in your plumbing skills or if the issue is complex, consult a professional plumber or technician who has experience with whole-house filters. They have the expertise and tools to diagnose and resolve the problem safely and effectively.
Troubleshooting Steps
Troubleshooting a leaking whole-house water filter involves a systematic approach to identifying and addressing the underlying issue causing the leak. Here are step-by-step instructions on how to inspect a leaking whole-house water filter:
1. Safety first
The first step in fixing a leaking whole-house water filter is to ensure safety by turning off the main water supply to your house. This critical precaution prevents any further water from entering the filter system, minimizing the potential for water damage and ensuring a safe working environment.
Locate the main water shutoff valve, typically located near the water meter or where the water line enters your home. Turn it clockwise (right) until it is fully closed.
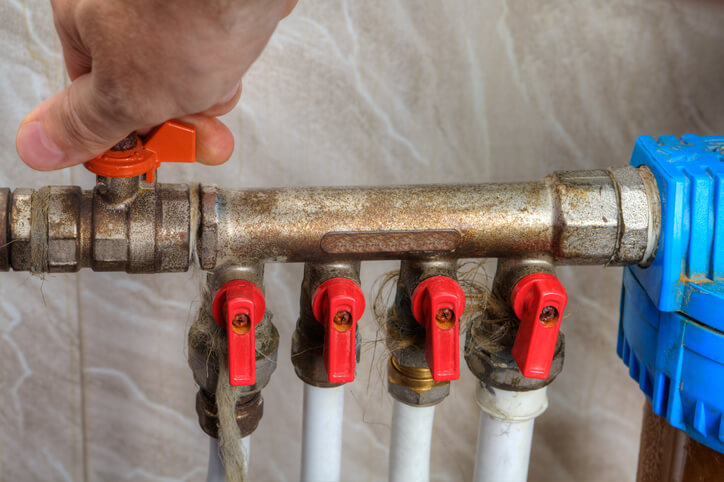
(Image source: Sunshine Plumbing and Gas)
2. Inspect the filter housing
The second step involves inspecting the filter housing for visible cracks, damage, or signs of leaks. Examine the entire filter housing, which is typically a cylindrical or rectangular container. To assist with the inspection, you may need a flashlight or headlamp to illuminate hard-to-see areas. Look for any noticeable cracks, fractures, or holes in the housing’s material.
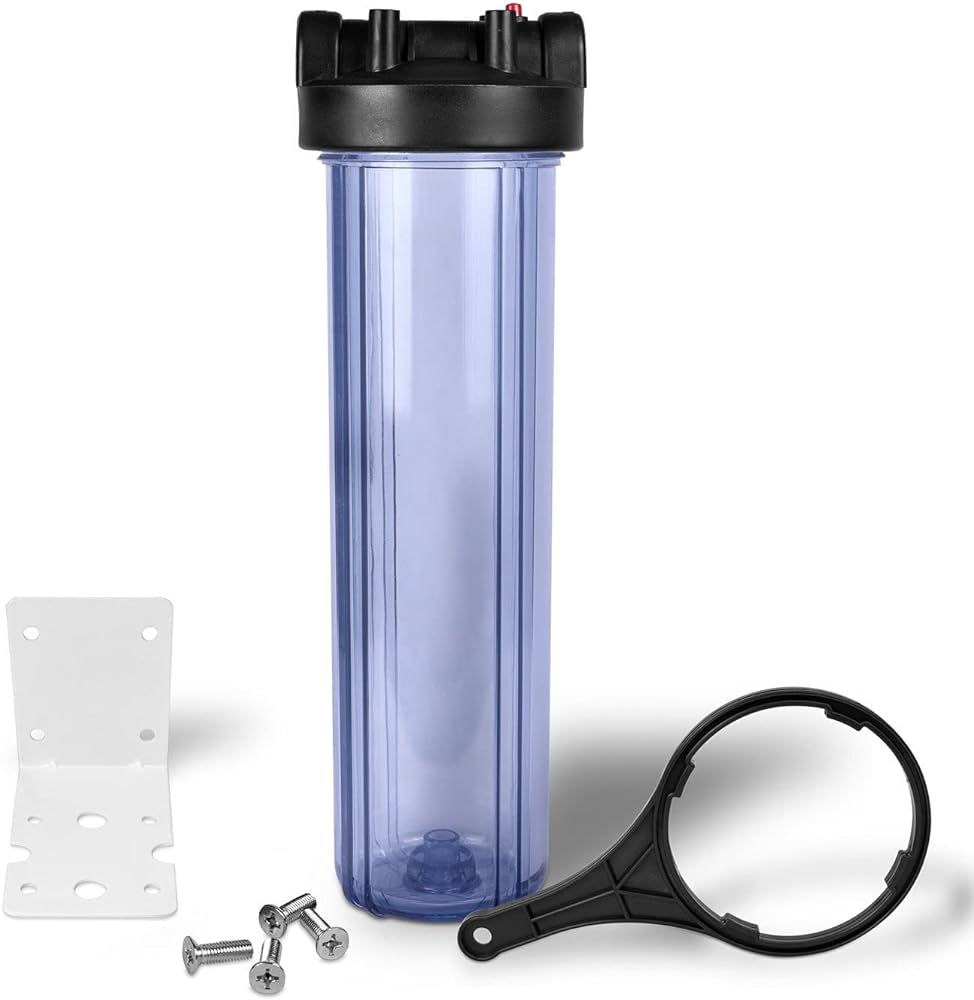
(Image source: Amazon)
If you spot any damage, it’s likely the source of the leak, and you may need to replace the housing. An adjustable wrench can be handy during this step to help you remove the housing’s cover or access panel, allowing a more thorough inspection of the filter and its components.
3. Check connections
Using an adjustable wrench or pliers, inspect the inlet and outlet pipes, fittings, and seals for any signs of looseness, damage, or wear. Start by tightening loose connections to ensure they are snug and properly sealed, taking care not to overtighten and damage the threads.
Examine the seals and gaskets within these connections, and if you find any that are worn, cracked, or deteriorated, replace them with new ones.
The pliers may be employed to gently remove the old seals and securely install the replacements. Ensuring that these seals and gaskets are in optimal condition guarantees a watertight seal at connection points and minimizes the risk of leaks in your whole-house water filter system.
4. Check the pressure relief valve
Inspect and test the pressure relief valve if your filter system is equipped with one. Look for any visible damage or signs of malfunction, using a flashlight to get a clear view. To assess its functionality, you can use a pressure relief valve test gauge.

(Image source: Freepik)
Attach the gauge to the valve and open a nearby faucet to simulate water flow. The gauge will display the pressure reading, and you should observe a release of excess pressure from the valve. If the pressure relief valve is stuck or fails to operate correctly, replace it with a new one.
This step helps ensure that the pressure relief mechanism is functioning properly, reducing the risk of pressure-related leaks in your whole-house water filter.
5. Look for clogs
Next, check the filter cartridge for clogs or blockages. Depending on your specific filter system, you might need to use a wrench or pliers to access and remove the filter housing cover or cartridge chamber.
Once exposed, carefully inspect the filter cartridge for any visible signs of clogs, sediment buildup, or discoloration. If the filter is clogged or dirty, follow the manufacturer’s instructions for replacing it. This process typically involves turning off the water supply, removing the old filter, and installing a new one.
Clean the filter housing and its components as needed before reassembling the system. Regular maintenance of the filter cartridge ensures proper water flow, prevents pressure buildup, and reduces the risk of leaks in your whole-house water filter.
6. Assess the water pressure
This step involves measuring and assessing the water pressure in your entire plumbing system. To do this, use a pressure gauge, which you can attach to a hose bib or faucet. Turn on the water supply and observe the pressure reading on the gauge.
Compare this reading to the recommended pressure range specified by the filter’s manufacturer. If the pressure falls outside the recommended range, you may need to install a pressure regulator to maintain a safe and consistent water pressure level.
A pressure regulator can help alleviate stress on the filter system, reduce the risk of leaks caused by high water pressure, and ensure the system operates optimally.
7. Inspect for corrosion
For this step, you’ll primarily need a flashlight. Carefully examine the metal pipes, fittings, and connectors within and around the whole-house filter system for any evidence of corrosion, rust, or deterioration.
If you discover corroded components, replace them with non-corrosive alternatives, such as PVC or CPVC pipes or brass fittings. While no specialized tools are required for this step, thorough visual inspection can help identify and address potential sources of leaks stemming from corroded or weakened plumbing connections.
8. Confirm freeze protection
You need to check that the whole-house filtration system and its components are adequately protected against freezing temperatures. No specific tools are required for this step, but it’s essential to visually inspect the filter system’s location and insulation.
Ensure that the filter system is situated in an area where it won’t be exposed to freezing temperatures or drafts. If the filter system is vulnerable to cold weather, consider insulating it with appropriate materials, such as foam insulation sleeves or heat tape.
By protecting the whole-house system from freezing, you reduce the risk of damage and potential leaks caused by cracked components due to ice expansion. This step is particularly crucial for homes in regions with cold climates.
9. Reassemble and test
This final step involves reassembling the filter system and conducting a final test. Utilize an adjustable wrench or pliers as needed to ensure all connections are securely tightened. Be cautious not to overtighten to prevent damage. After reassembling, turn on the main water supply and carefully monitor the filter system for any signs of leaks or drips.
Observe the connections, the whole-house filter housing, and the pressure relief valve if applicable. If the leak persists, you should probably consult a professional plumber or technician with expertise in water filtration systems for further diagnosis and repair.
Preventing Leaks in Your Whole-House Filter System
Whole-house water filters are supposed to be convenient and hassle-free — that’s why you got one in the first place. If you’re like me and would like to avoid going through this entire ordeal, you can adopt the following preventative measures:
- Buy the right-sized system. Ensure that your whole-house water filtration system is the right size for your home and water usage needs. They come with different flow rates and capacities, so you won’t need the same filter for a small household that you would for a large family.
- Install your system properly. Ensure the whole-house system is installed correctly, following the manufacturer’s instructions and local plumbing codes. Hire a professional if you doubt your abilities.
- Follow a maintenance schedule. Adhere to the manufacturer’s recommended maintenance schedule for replacing filter cartridges, seals, and gaskets.
- Use a water leak detector. Consider installing a water leak sensor to detect a water leak within your system and shut down the water supply to prevent flooding.
- Keep the filter area dry. Keep the area around the filter system dry and well ventilated to prevent mold growth and deterioration of components.
- Avoid overloading. Avoid exceeding the filter system’s capacity or recommended flow rate to prevent excessive pressure and potential leaks.
- Use quality filters: Invest in high-quality filter cartridges that effectively remove contaminants without restricting water flow excessively.
- Install a water softener. If you have hard water, consider installing a water softener before the whole-house filter to prevent scale buildup that can damage components.
- Install an emergency shutoff valve. Install an emergency shutoff valve on the water supply line to quickly stop water flow in case of a sudden leak.
- Hire a professional. If you’re unsure about maintenance or experience persistent issues, consult a professional plumber or technician for regular inspections and servicing.
By proactively implementing these preventative measures, homeowners can maintain a leak-free and efficient whole-house filtration system, ensuring a high-quality drinking water supply.
Final Thoughts
I hope this article was an informative and valuable tool to help you troubleshoot your leak and maintain a dependable water filtration system. As a homeowner, I understand the peace of mind that comes with clean water, and I also know the frustration that leaks can cause.
That’s why I put together this guide — to empower you to address issues proactively and keep your home’s water supply pristine. If you enjoyed this tutorial or found it useful, I’d love to hear your thoughts in the comments below.
Feel free to share this article with friends and family who might benefit from it, ensuring that everyone can enjoy the benefits of a leak-free whole-house water filter. Your feedback and sharing help build a community dedicated to clean, safe water for all.
If your thorough inspection has revealed that you’re actually in need of a new system, read my review of the best whole-house water filtration systems to help you choose one that will meet your specific needs.
Looking to explore whole-house filters more thoroughly? Take a look at the extra resources we’ve included below:
- The Best 3-Stage Whole House Water Filters
- The Best Whole-House Carbon Water Filters
- Whole-House Water Filter Cost
- 7 Reasons Your Whole-House Water Filter Gets Dirty Fast
- 13 Whole House Water Filter Benefits
- How to Bypass a Whole-House Water Filter
- What Are Whole-House Backwash Filters and How Do They Work?
