
To bypass a whole-house water filter, turn off the water supply, locate the bypass valve, and move it from “filter” to “bypass,” then turn the water back on, checking for leaks and ensuring your water is flowing properly.
No doubt you appreciate your whole-house water filter, silently and stoically protecting your water supply behind the scenes. Still, there may be times when you need to bypass the filter system, such as during maintenance or repairs.
After working in the water purification industry for some time, I know some of these procedures can puzzle homeowners. So I’ve put together this guide to empower you with the knowledge and confidence to manage your home’s plumbing system and bypass your whole-house filter effectively.
Quick Summary
- You may need to bypass a whole-house water filtration system to conduct maintenance, address specific water needs, or make repairs.
- Bypassing a whole-house filtration system means diverting water away from the filter system, allowing unfiltered water to flow through the house.
- Your system may come with a pre-installed bypass valve, but if you have to install one yourself, the steps below will help.
How to Bypass a Whole-House Water Filter
Bypassing a whole-house filtration system means diverting water away from the filter system, allowing unfiltered water to flow through the house. This is useful when maintenance or repairs are needed on the filter system or when unfiltered water is preferred for certain tasks.
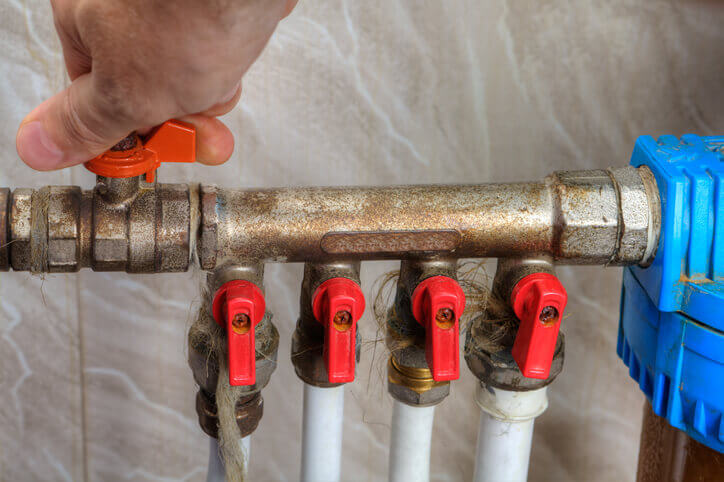
A typical bypass valve directs water around the filter, and the right and left valves (also called ball valves) are closed while the center valve is opened, allowing water to flow around the filter.
Many whole-house filtration systems come with a dedicated bypass valve already installed. Dedicated bypass valves are usually easier to operate since they have a simple on/off function for bypassing the filter. In that case, bypassing the filter is as simple as turning the valve from “filter” to “bypass.”
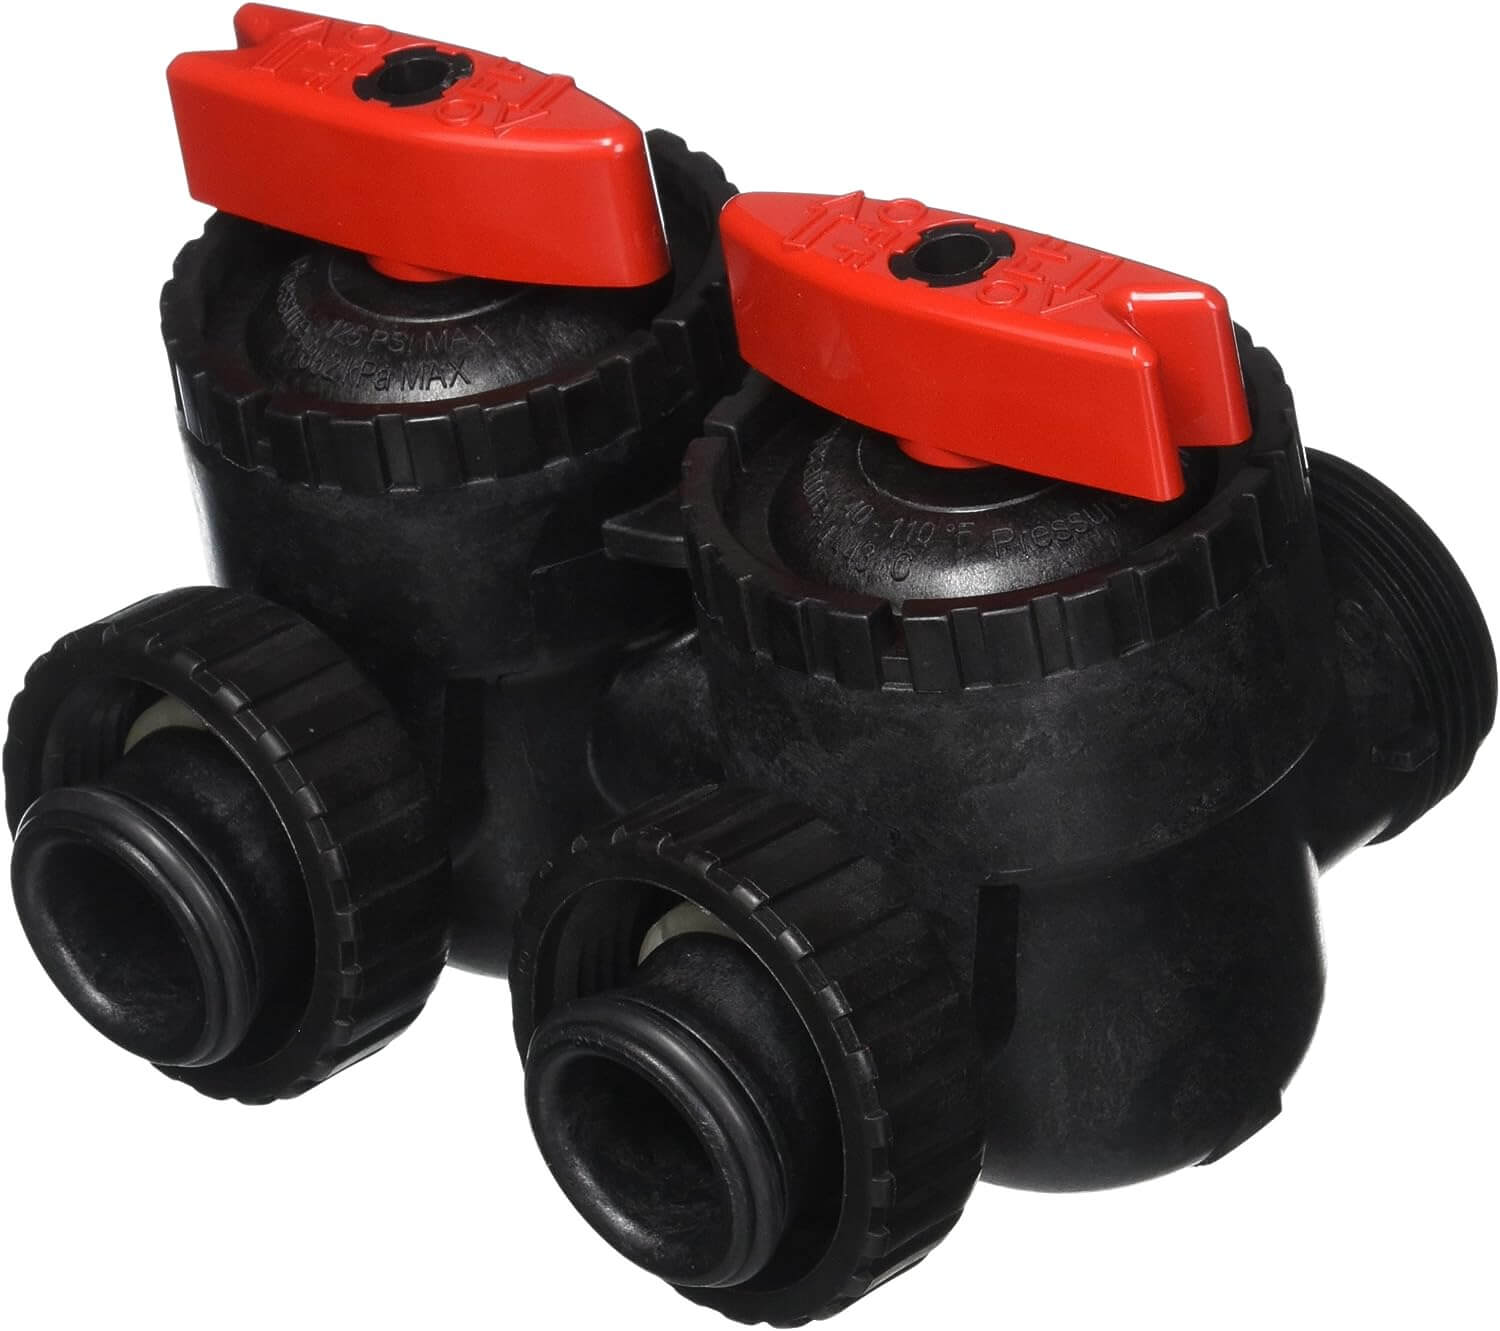
A dedicated bypass valve with red shutoff switches. (Courtesy: Amazon)
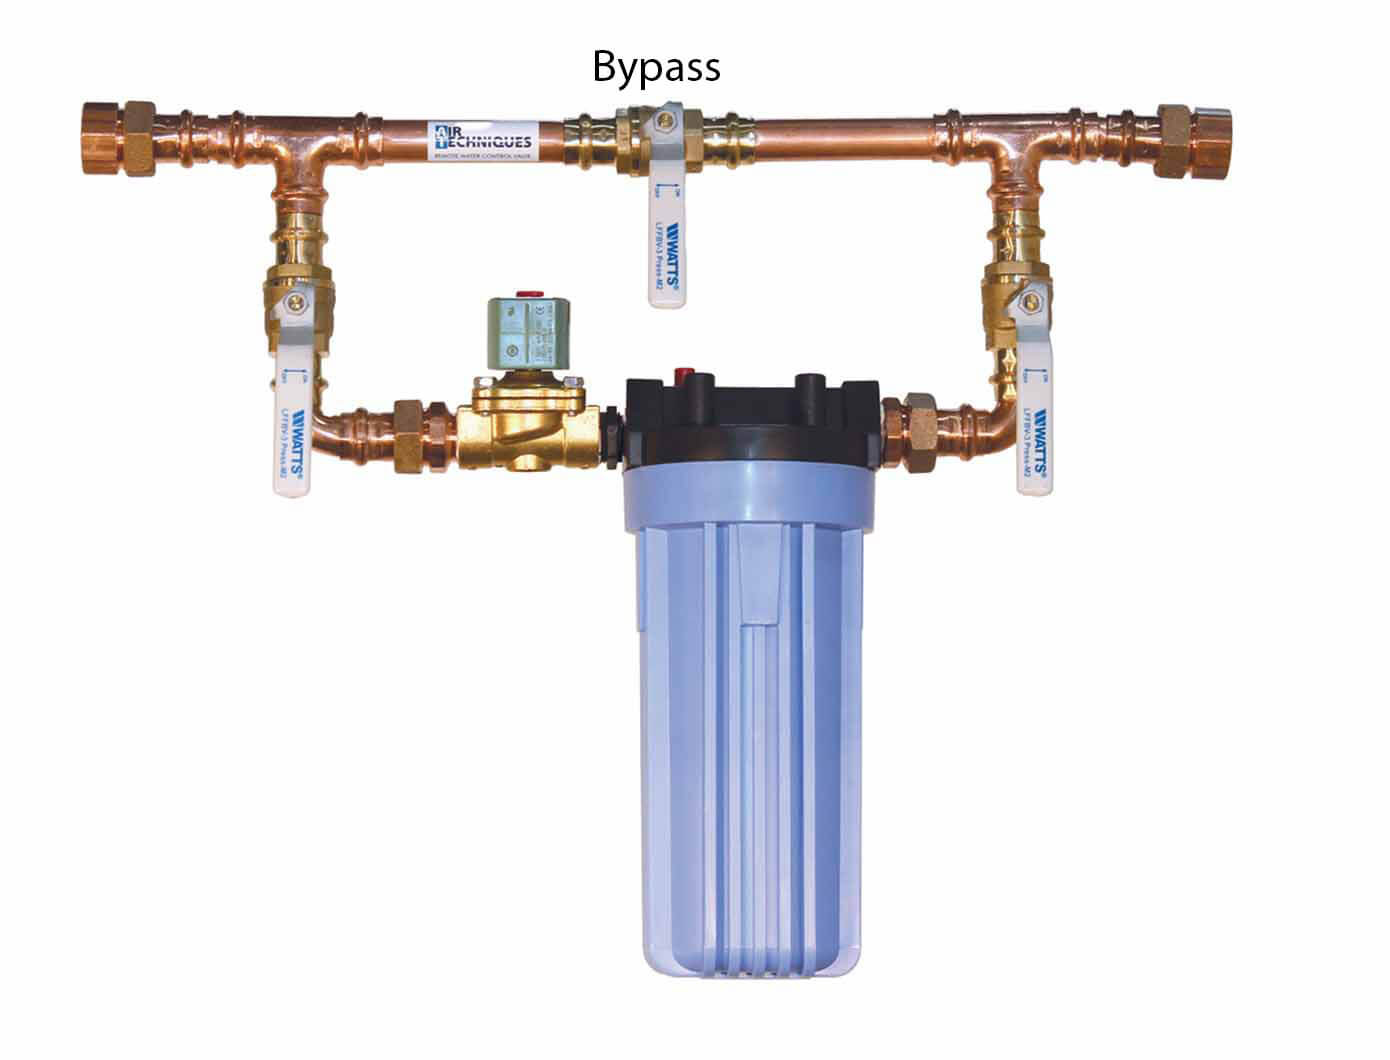
However, some systems do not come with the bypass valve pre-installed. If that’s the case with your filter, you’ll have to install it yourself. The most common setup is the three-valve hard-piped bypass shown below.

Three-valve hard-piped bypass illustration (Courtesy: Puriflow filters)
In this setup, the bypass valve is typically installed near the water filtration system, upstream from the hot water heater, and as close as possible to the filter. It is usually made up of three ball valves, with flow coming from the left in the picture. When you want filtered water, the left and right ball valves stay open while the center valve is closed.
While installing a bypass valve system may not be the easiest thing you’ve ever done, especially if you have no plumbing experience, it’s not impossible. Follow the steps below and you may surprise yourself with how handy you can be.
Items Required for This Procedure
The exact tools you’ll need can depend on the type and model of your water filter system, but these are some general items you’ll want to have on hand when you get started:
- Owner’s manual or instructions: Start by consulting the owner’s manual or installation instructions provided by the manufacturer of your water filter system. These documents will contain specific information on how to bypass your particular system.
- Adjustable wrench: An adjustable wrench is useful for loosening and tightening plumbing connections, such as pipe fittings and hose clamps.
- Pliers: Pliers may be needed for tasks like removing hose clamps or securing fittings.
- Pipe cutter or tubing cutter: If your water filter system includes tubing or pipes, a pipe cutter or tubing cutter may be necessary to cut and reconfigure the plumbing.
- Screwdriver: A screwdriver may be needed for removing screws, fasteners, or access panels on your filter system.
- Teflon tape: Teflon tape, also known as plumber’s tape, can seal threaded connections and prevent leaks.
- Bucket or container: Have a bucket or container on hand to catch any water that may spill when disconnecting or bypassing the water filter.
- Rags or towels: Keep some rags or towels nearby to wipe up any water or spills and to ensure a clean working area.
- Gloves and safety glasses: Wearing gloves and safety glasses will protect your hands and eyes during the process.
- Bypass valves and pipes: Be sure to match the pipe and valve size to your current plumbing and whole-house filter.
- Plastic caps or plugs: In some cases, you may need plastic caps or plugs to seal off open ends of pipes or tubing when bypassing the filter.
- Pipe sealant (thread sealant): Depending on your house’s plumbing connections, you might need pipe sealant to ensure a watertight seal.
Remember, the specific tools and materials required can vary based on the design and components of your water filtration system. It’s crucial to consult the manufacturer’s instructions for your specific model to ensure you have the necessary tools and follow the correct steps to perform a whole-house water filter bypass.
If you’re uncertain or uncomfortable with the process, seek the assistance of a professional plumber or technician to ensure it’s done safely and correctly.
Installing a Three-Valve Hard-Piped Bypass
Follow these key steps for installing a bypass valve on your whole-house water filter:
Step 1: Turn off the water supply
The first step in installing a three-valve hard-piped bypass for a whole-house water filter is to shut off the main water supply using a pipe wrench or adjustable pliers, and it’s crucial for ensuring safety and preventing water flow during the installation.
(image source: Sunshine plumbing and gas)
Locate the main water shutoff valve in your home, typically positioned near where the water line enters the house, and turn it clockwise until it’s fully closed to halt water flow through the plumbing system. This step ensures a controlled and dry work environment for the installation process, minimizing the risk of accidents and water damage.
Step 2: Plan bypass location
The second step involves planning the location for the bypass assembly and marking where the valves will be installed. Use a measuring tape to determine the optimal placement, usually near the inlet and outlet of your water filter system for easy access. Measure and mark the specific spots on the water supply pipes where you intend to install the three valves.
Ensure precise measurements for accurate alignment. This step sets the groundwork for the installation process, helping you identify the exact points where the valves will be positioned, and it’s crucial for ensuring the bypass system functions as intended.
(Image source: Air techniques )
Step 3: Cut the water pipes
Cut the water supply pipes at the marked locations using a pipe cutter or hacksaw. This step is essential for creating openings in the plumbing system where the valves will be inserted. Using a pipe cutter or hacksaw, carefully make clean and precise cuts at the measured marks.
After cutting, use a deburring tool or sandpaper to remove any rough edges or burrs from the cut pipe ends. This ensures a smooth surface for proper sealing when the valves are installed and prevents leaks.
Note: Wear safety goggles during this step to protect your eyes from debris.
Step 4: Install the valves
Next, assemble and install the three ball valves according to the manufacturer’s instructions. You’ll need a pipe wrench or adjustable pliers to tighten the valve connections securely.
Assemble the bypass kit components, which typically include the three ball valves and any necessary connectors or adapters, ensuring they’re correctly configured.
The inlet valve connects to the pipe that brings water into the filter, the outlet valve attaches to the pipe that carries filtered water out, and the bypass valve connects the two cut pipes to allow water to flow around the filter.
Using the pipe wrench or pliers, tighten the connections firmly, but be cautious not to overtighten and risk damaging the valves or pipes.
Step 5: Apply Teflon tape
Applying Teflon tape to the threads of the valve and pipe fittings ensures a watertight seal. Simply wrap the tape in a clockwise direction around the threads of each valve and any connecting joints.
Teflon tape acts as a lubricant and sealant, helping to prevent leaks when the system is pressurized. It’s essential to wrap the tape carefully and evenly around the threads, ensuring there are no gaps or overlaps. Use an adjustable wrench or your fingers to firmly press the tape into place.
Step 6: Test the valves
Move the handles or levers of each of the three valves to verify their functionality. The inlet valve should allow water to flow into the filter, the outlet valve should permit filtered water to exit, and the bypass valve should divert water around the filter.
This step helps ensure that all the valves are correctly installed and oriented for their respective functions. By testing the valves now, you can identify and address any issues with their operation before proceeding further. No special tools are required for this step; simply manipulate the valve handles as intended to confirm proper operation.
Step 7: Secure and label
Secure the valves in their final position and label them clearly for future reference. Use an adjustable wrench to tighten the valve connections further if necessary, ensuring they are firmly in place and do not move.
Properly securing the valves prevents any unintended adjustments and helps maintain a reliable water flow control system. Additionally, labeling the valves is crucial for easy identification, ensuring that you or anyone else using the system can readily understand which valve controls the inlet, outlet, and bypass functions.
Step 8: Restore water flow
Gradually turn on the main water supply valve to pressurize the system. This should be done slowly to avoid sudden surges of water pressure. As you turn the main water supply valve clockwise using a pipe wrench or adjustable pliers, carefully monitor for any leaks around the valve connections and joints.
If you notice any leaks, immediately turn off the main water supply and use the appropriate tools to tighten the connections further. Once the system is pressurized without any visible leaks, you can proceed to the final step.
Step 9: Bleed air and check for leaks
For this last step, you’ll need to bleed air from the system and check for any lingering leaks. To do this, open faucets or taps in your house, starting from the lowest point in the plumbing system and working your way up to the highest point.
Allow the water to flow for a few minutes until it runs smoothly and without sputtering. This process helps release any trapped air and ensures the water circulates properly throughout the system. While the faucets are running, carefully inspect all the valve connections and joints for leaks one last time.
If you spot any leaks, use the appropriate tools (such as a pipe wrench or adjustable pliers) to tighten the connections further until they are secure and watertight. Completing this step ensures your bypass system operates seamlessly without any airlocks or leaks, providing you with reliable control over your whole-house filtration system.
Final Thoughts
I hope you’ve found this guide on how to bypass a whole-house water filter both informative and practical. My goal was to empower you with the knowledge and skills to confidently manage your water supply according to your needs, whether it’s for maintenance, repairs, or specific tasks.
If you found it helpful, don’t hesitate to share it with others who might benefit from this essential house plumbing know-how. Use the comments section below to share how your bypass project went.
See my other how-to guides for more information on performing maintenance and repair tasks on your water filters and related appliances.
Are you interested in delving deeper into whole-house filters? Check out the additional resources we’ve provided below for your exploration:
- The Best 3-Stage Whole House Water Filters
- The Best Whole-House Carbon Water Filters
- Whole-House Water Filter Cost
- 7 Reasons Your Whole-House Water Filter Gets Dirty Fast
- 13 Whole House Water Filter Benefits
- Is Your Whole-House Water Filter Leaking? A Troubleshooting Guide
- Whole-House Water Filter Installation
